Sorry I have been missing for a while, but I had an unexpected death to deal with and to be honest it rocked me to the core...plus it was complicated so it took a lot of sorting out. Anyway I'm back and today sees the start of the July challenge over at the Just For Fun Challenge Blog and the theme is anything goes.
I have been using my dies a lot recently and today I want to show you a card I made from two pieces of printed paper and a few scraps from my bits box. I love the monochromatic look and I think this would be suitable for a number of occasions.
So I started with a 6x6" card blank and cut a piece of black card to 5.75x5.752 to mat on to the front, then I cut then I printed both the white and black papers, which were freebies from Jak Heath's blog ages ago and cut the white sheet to 5.75x5.75" and matted this on to the black card stock. The sentiment I printed on to white card and cut out using a set of Spellbinder label dies and I also cut a larger one in black to mat the sentiment on, along with the large Cheery Lynn flourish, which I have cut up into smaller sections. The flowers were made using the black dotty paper and they were cut using the Spellbinder D-Lite dies Blossom One. I layered them up and added a white card candi to the center, I placed the flourish around the sentiment and added the flowers to finish off.
I hope you can join in with the challenge and I look forward to seeing everyone's entries :)
Tuesday, 1 July 2014
Thursday, 8 May 2014
Monohromatic Monogram
Today I want to show you a card that I made for a couple of challenges over on Facebook. One theme was monochromatic, the other monogram and as I don't seem to have a lot of crafting time at the moment I thought why not combine both themes...and this is the result.
I printed the backing paper from Debbi Moore's Black & White Chic Boutique CD and I trimmed this to 7.5" square and matted on to black card whick I cut at 7.75" square, then I popped this on to the white card blank. The monogram came from the square flourish frame monograms which I purchased from the Silhouette store and that can be found here. The design comes with two versions of the design, one has the letters welded to the frame (which is the one I chose to use) the other one has is a separate frame and letter. I wanted to have a mat for the design so I selected it and offset to .10 for the white and then decided I wanted the black mat to the the bottom layer so I offset my fist offset layer to .15 to get the black back ground, then I just layered them up using a glue pen because of the delicate swirls. The corners were cut from the ivy deco frame die set in the same black card and I mounted both the assembled topper and the corners using 1mm foam tape for a little dimension. A few black gems both above and below the monogram topper and the card was complete.
I would like to enter this in to the Cameo with Carley Challenge Blog for which the them this month is anything goes.
Tuesday, 6 May 2014
Sail Away
Today I want to share a card I made for a challenge over at the Mad Crafters Giggles group on Facebook. I love this group and the challenges they have just for fun, it gets my creative juices flowing. The theme for yesterday's one word wonder challenge was 'holiday' and I had been itching to use the new stamps I had recently purchased from another Facebook group the allows members to sell off their unwanted craft goodies.
I started by cutting a piece of centura pearl card to 6"x4" and inking with scattered straw and stormy skies distress inks, I then stamped over the blended background using a black ink pad. I have to say this stamp which is by Just Rite Stamps is very large and I didn't have a block big enough, so I had to improvise by laying the stamp on the desk and placing the card over the top and smoothing it on to the inked stamp. I've not done this before and as a novice stamper I was a little worried, but I think it's turned out quite well.
I stamped the sentiment which is from a Lili Of The Valley set again using black ink on to another piece of centura pearl card and gently blended around the edges using the scattered straw distress ink pad to tie the colour in with the main image, a little matting and layering using card from my stash and the stamped elements were finished. I cut the cruise ship on my Silhouette Cameo machine from a file that can be found in the store here and assembled it. I used an A4 card blank which I made from a sheet of A3 centura pearl card, added the stamped elements and the topper, a few card candi for a great card for any man I think.
I wish to enter this in to the cameo With Carley Challenge Blog which this month is an 'Anything Goes' theme.
Thursday, 1 May 2014
New Challenge Over At Seemacrafts
So today see the start of a new challenge over at seemacrafts blog and the theme for this month is butterflies and rainbows. I wasn't sure what I was going to do really, until I found this beautiful cutting file in the Silhouette store...then my mind was made up.
The file is by Marji Roy and can be purchased from the store here and the comprehensive assembly instructions can be found on her blog here.
So I started by cutting all the elements on my Cameo machine, I decided I would do a coloured version but I'm sure this would look equally as great in all white with just a splash of colour for the butterfly wings. I cut the front and back frame sections and the butterfly bodies using black card, and the leaves in a green, pearlescent card and I cut the inner wing sections in a bright pink glitter paper which doesn't really show in the photo...but looks very pretty in real life.
I didn't want the back section to be open and so I cut a piece of graduating card stock in blue and green to fit in to the interior of the back section before I finished assembling the rest of the sections. I love the finished result and it was so very easy to make. I hope you can join in with us over at seemacrafts for the chance to win four of Seema's digis of your choice.
Tuesday, 29 April 2014
Ladybug Kitty
Today I want to show you this cute card I made using my Cameo machine for my Great Niece's Birthday next month. Keira will be 6 and is Hello Kitty crazy so I wanted to find something I could make using Kitty especially for her.
I came across this free cutting file on the September Ninth blog and the file can be found here and instantly thought it was ideal for Keira's Birthday card, so I cut out two of the base pieces in black so that I could score and join them together so the card would stand and I cut the rest of the pieces out in the appropriate colours (the pieces are actually shown in the necessary colours on the actual cutting file for reference for ease of use).
I layered the pieces up using the photo on the blog as reference to make sure I popped them in the right places (was very easy to do) then I added the little red bow around the flower, the little wooden ladybug which I had in my stash and a few little gems to add a little sparkle for a very quick but oh so cute card which I'm sure Keira is going to love.
I am entering this in to the Cameo With Carley Challenge Blog-Cute or Whimsical
Wednesday, 23 April 2014
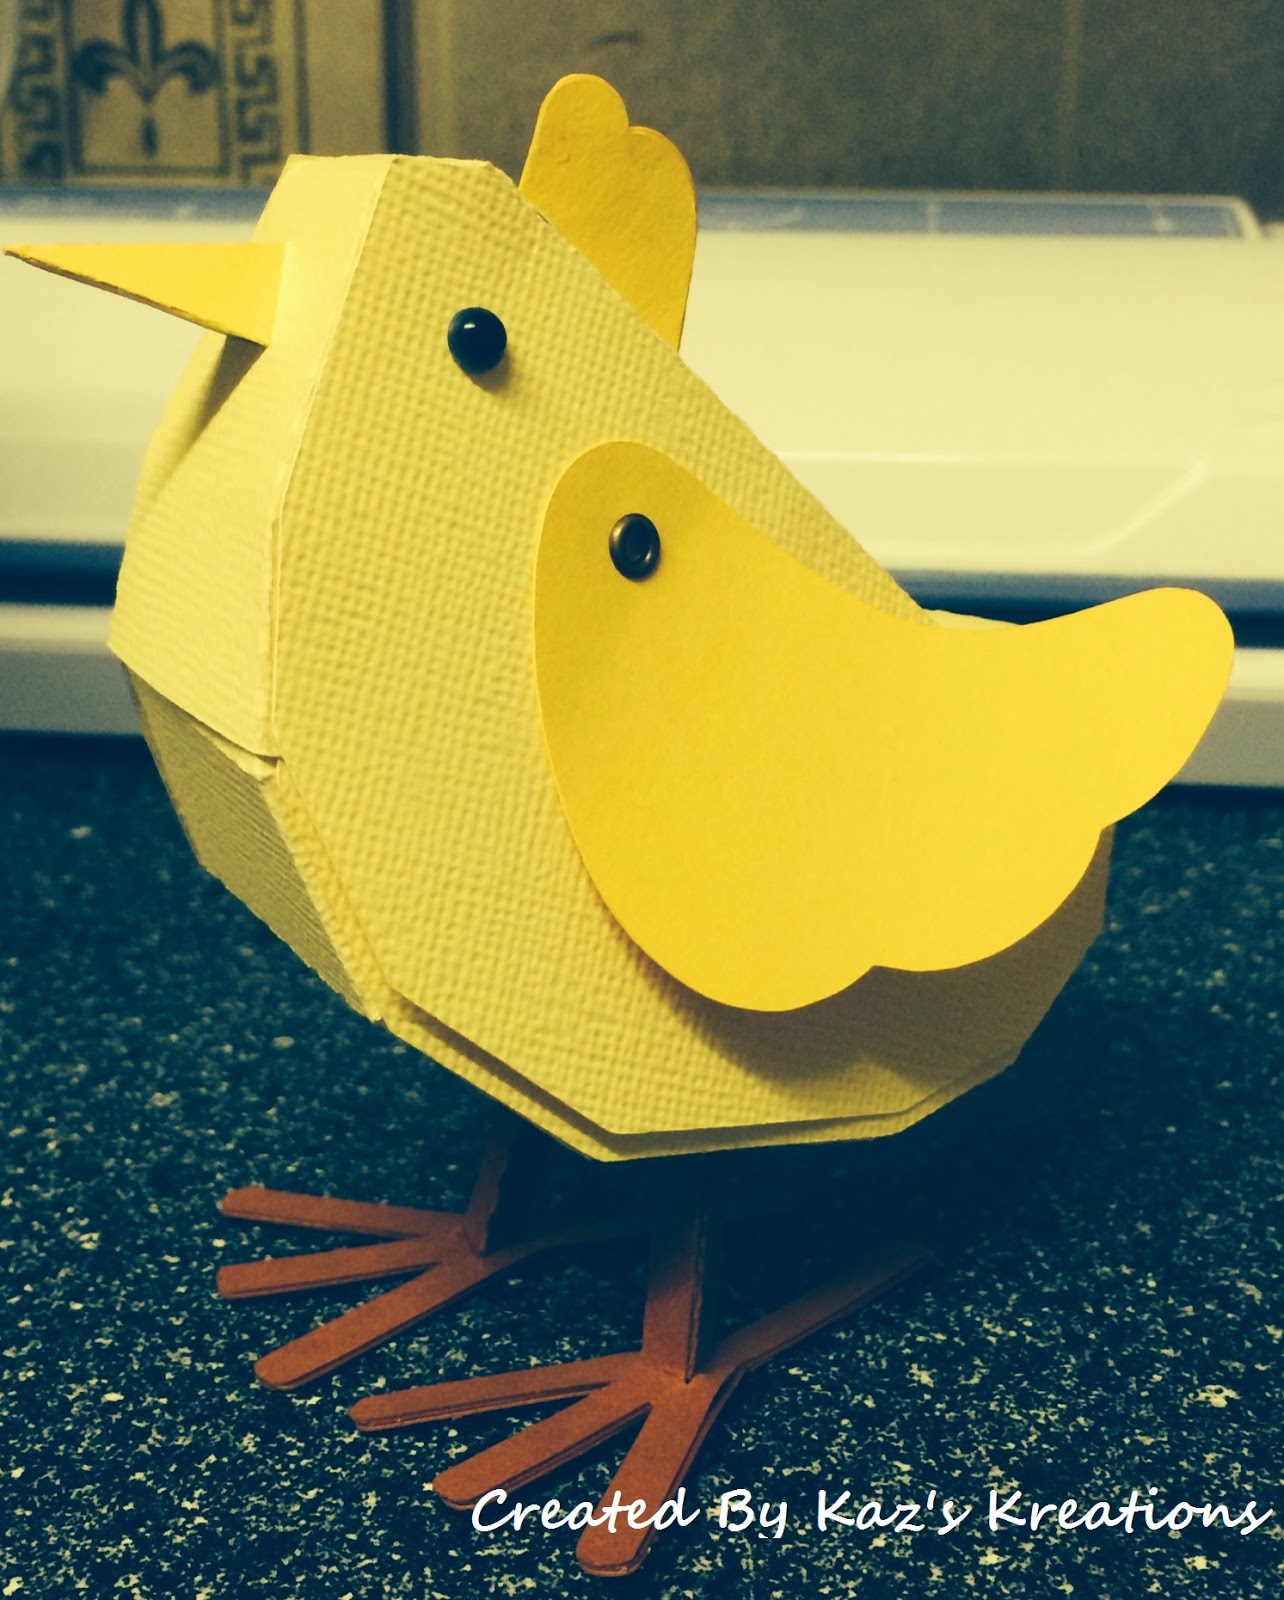
Easter Chick
Today I want to show this cute little box that I made on the Cameo machine using a file from the Silhouette Store, it's by Snapdragon Snippets and it can be found here.
I started of by cutting all the parts out on the Cameo Machine using American Crafts card stock and then assembling them following the instructions given on the website here. I used the strong red double sided tape for the body and wet glue for all the other parts as I find this holds stronger. I chose not to add the ribbon which is optional and I also used little black pearls for the eyes rather than the card layers, but I love the finished item I have to say.
I found certain parts a little fiddly, but that could well have something to do with my fat fingers lol, and having made one I would probably change the order of assembly to suit me next time, but he goes together very well.
I am entering this in to the Cameo With Carley Challenge Blog-Cute or Whimsical
Friday, 18 April 2014
Faux Leather Note Book
Today I wanted to show you my first effort using Sheena Douglass's faux leather technique. I did this while visiting my dear friend Zoe, but you can find out how to do it for yourself here. I wanted to make a little note book for my Mum to jot things down and so I chose to use dark pink tones for the ink rather than the brown tones which I think actually looks more leather like.
So after making the cover following the instructions given I cut several pages of pale pink lightweight paper to fit inside and sewed them in to the cover using a waxed thread, I added the ribbon and bow to the side of the note book and I found this lovely sentiment topper in my stash. A few flowers and pearls added using glue gel and you have a very pretty and cheap to make little gift. Why not give it a try yourself, it's very easy to do and looks fabulous!
Subscribe to:
Posts (Atom)